

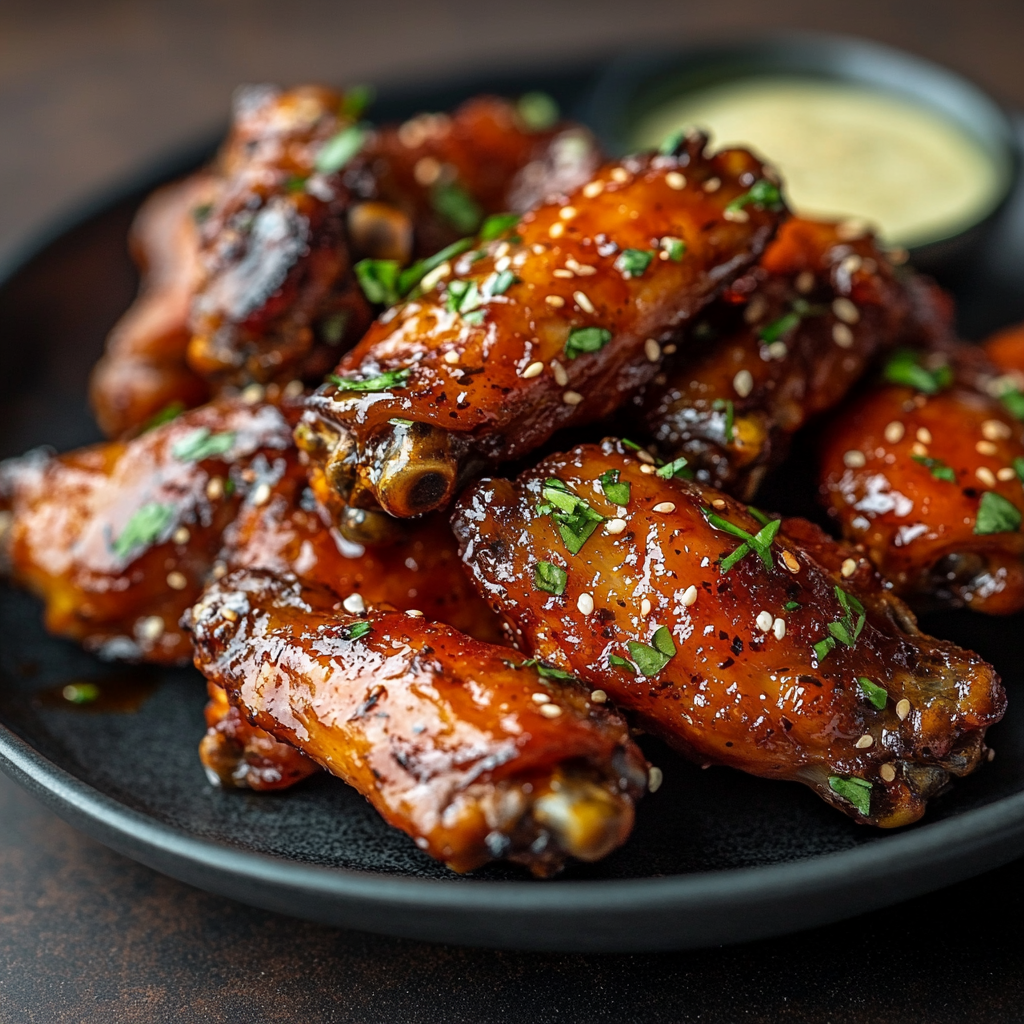
Crispy Baked Buffalo Chicken Wings: Perfectly Crunchy, Tangy, and Spicy! 🍗🔥🧈
Forget the deep fryer! These Crispy Baked Buffalo Chicken Wings deliver all the irresistible crunch, juicy tenderness, and iconic tangy heat you crave, all achieved right in your oven. The secret lies in a simple baking powder trick that draws out moisture, combined with high-heat roasting, resulting in wings so crispy, you’ll swear they were fried. Tossed in a classic homemade Buffalo sauce, these wings are the ultimate crowd-pleaser for game day, parties, or simply a delicious indulgence. Get ready for wings that are easy to make, easier to clean up, and absolutely impossible to resist!
(Why This Recipe is “The Best”: The Science of Crispiness without Frying ✨)
This recipe achieves superior crispiness and flavor through a few key techniques:
- Baking Powder Magic: A small amount of aluminum-free baking powder mixed with salt subtly raises the skin’s pH, which promotes browning and helps break down proteins, resulting in an incredibly crispy texture. It’s a game-changer for baked wings!
- High Heat Roasting: Baking at a high temperature (400-425°F / 200-220°C) renders the fat and crisps the skin efficiently.
- Elevated Rack: Baking the wings on a wire rack set over a baking sheet allows air to circulate around them, preventing sogginess and promoting even crisping.
- Drying Time: Patting the wings dry before seasoning is crucial, and letting them sit briefly after coating helps the skin further dehydrate.
- Classic Buffalo Sauce: A perfectly balanced sauce with just the right ratio of hot sauce, butter, and a touch of tang, ensuring maximum flavor without overwhelming the crispy skin.
Ingredients: Your Wing Night Essentials 🛒
This recipe yields approximately 4-6 servings (about 2-3 lbs of wings, or 20-24 pieces).
I. For the Crispy Baked Wings:
- 2-3 lbs (approx. 1 – 1.4 kg) Chicken Wings, “party wings” (flats and drumettes separated)
- Function: The star of the show! Separated wings cook more evenly.
- 1 tbsp Aluminum-Free Baking Powder (critical for crispiness! Do NOT use baking soda)
- ¾ tsp Salt (or to taste)
- ½ tsp Black Pepper (or to taste)
- Optional: ½ tsp Garlic Powder for extra flavor
II. For the Classic Buffalo Sauce:
- ½ cup (120ml) Frank’s RedHot Original Cayanne Pepper Sauce (this is the classic for Buffalo wings!)
- ⅓ cup (75g) Unsalted Butter, melted
- 1 tbsp White Vinegar (distilled white or apple cider vinegar work)
- Function: Adds a crucial tangy depth to the sauce.
- ½ tsp Worcestershire Sauce
- Function: Adds umami and complexity.
- ¼ tsp Garlic Powder (or more, to taste)
- Optional: A pinch of Cayenne Pepper for extra heat
III. For Serving:
- Blue Cheese Dressing (homemade or good quality store-bought)
- Celery Sticks
- Carrot Sticks
Step-by-Step Preparation: From Raw to Irresistibly Crispy 📝
Follow these steps precisely for the crispiest baked wings!
- Prepare the Wings (10 minutes prep, 15-30 minutes drying):
- If your wings are whole, use kitchen shears or a sharp knife to separate the drumettes from the flats. Discard the wing tips (or save them for chicken stock).
- CRUCIAL STEP: Pat the chicken wings EXTREMELY dry with paper towels. The drier they are, the crispier they’ll get.
- In a large bowl, toss the dried wings with the baking powder, salt, black pepper, and optional garlic powder. Make sure every wing piece is evenly coated.
- Arrange the seasoned wings in a single layer on a wire rack set over a large baking sheet. Ensure there’s space between each wing for even air circulation.
- For best results, let the wings air dry in the refrigerator for at least 15-30 minutes, or up to several hours (or even overnight). This further dehydrates the skin and enhances crispiness. If you’re short on time, even 15 minutes at room temperature is better than nothing after the initial pat-drying.
- Preheat Oven & Bake Wings (45-60 minutes):
- Preheat your oven to 400°F (200°C).
- Place the baking sheet with the wings (on the wire rack) into the preheated oven.
- Bake for 45-60 minutes, flipping the wings halfway through (after about 25-30 minutes).
- The wings are done when they are deeply golden brown, incredibly crispy, and the fat has rendered. The skin should look shriveled and crunchy. Cooking time can vary depending on your oven and wing size, so watch them closely towards the end. If they’re not as crispy as you’d like, you can increase the oven temperature to 425°F (220°C) for the last 10-15 minutes, or even briefly hit them with the broiler (watching them constantly to prevent burning).
- Prepare the Buffalo Sauce (5 minutes):
- While the wings are baking, prepare your sauce. In a medium microwave-safe bowl or small saucepan, melt the unsalted butter.
- Stir in the Frank’s RedHot sauce, white vinegar, Worcestershire sauce, and garlic powder.
- Whisk until the sauce is completely smooth and emulsified. If using a saucepan, heat gently over low heat, but do not boil. If using the microwave, heat in 15-second intervals, whisking after each, until smooth.
- Optional: Add a pinch of cayenne pepper if you want extra heat.
- Toss and Serve (5 minutes):
- Once the wings are perfectly crispy, remove them from the oven.
- Transfer the hot, crispy wings to a large mixing bowl.
- Pour the prepared Buffalo sauce over the wings.
- Toss thoroughly with tongs until every wing piece is evenly coated in the delicious sauce.
- Serve immediately with generous sides of blue cheese dressing, celery sticks, and carrot sticks.
Pro Tips for THE CRISPIEST Baked Buffalo Wings ✨
- Baking Powder is NOT Baking SODA: Ensure you use aluminum-free baking powder. Baking soda alone will give a metallic taste and won’t achieve the same crispiness.
- Bone Dry Wings: This cannot be stressed enough. Moisture = steam = soggy wings. Pat, pat, pat! And then air dry in the fridge if you have time.
- Don’t Overcrowd: Give the wings space on the rack. If they’re touching, they’ll steam instead of crisping. Use two baking sheets with racks if necessary.
- High Heat is Key: Don’t be afraid of the high oven temperature. It’s essential for rendering the fat and achieving that crispy skin.
- Adjust Sauce to Taste: The amount of hot sauce and butter in the Buffalo sauce is a classic ratio, but feel free to adjust the spice level to your preference. More Frank’s for hotter, more butter for milder.
- Serve Immediately: Baked wings are always best straight out of the oven. The sauce can soften the crispiness over time.

Creative Variations & Customizations 🌈
Once you master the crispy baked wing technique, the flavor possibilities are endless!
- Lemon Pepper Wings: After baking, toss with melted butter, lemon pepper seasoning, and a squeeze of fresh lemon juice.
- Garlic Parmesan Wings: After baking, toss with melted butter, minced garlic, grated Parmesan cheese, and fresh parsley.
- Honey Sriracha Wings: Replace the Frank’s with Sriracha, and add honey to the sauce. Adjust ratios to taste.
- Sweet BBQ Wings: After baking, toss with your favorite BBQ sauce. For extra sticky, bake again for 5-10 minutes.
- Spicy Dry Rub: Before baking, coat the wings with a generous amount of your favorite spicy dry rub (e.g., Cajun, peri-peri, chipotle chili powder blend). No sauce needed afterwards.
- Korean Gochujang Wings: Create a sauce with gochujang (Korean chili paste), soy sauce, honey, rice vinegar, and sesame oil.
- Smoky Flavor: Add a pinch of smoked paprika to the wing seasoning, or a tiny dash of liquid smoke to the Buffalo sauce for a subtle smoky hint.
Serving Suggestions and Perfect Pairings 🍽️
Buffalo wings are inherently a party food, but they can also make a fantastic casual meal.
- The Classics: Blue cheese dressing (or ranch), celery sticks, and carrot sticks are non-negotiable for a true Buffalo wing experience.
- Sides for a Meal: French fries, tater tots, corn on the cob, a simple green salad, or coleslaw.
- Beverage Pairings:
- Beer: A crisp lager, a refreshing pilsner, or a hoppy IPA (the bitterness can cut through the richness and heat).
- Non-alcoholic: Iced tea, lemonade, or a cold glass of milk (especially if the wings are extra spicy!).
Storage & Make-Ahead Tips 🧊🗓️
- Storage (Cooked): Cooked wings are best eaten immediately. Leftovers can be stored in an airtight container in the refrigerator for up to 2-3 days. The skin will lose its crispiness.
- Reheating: To regain some crispiness, reheat in an air fryer at 350°F (175°C) for 5-8 minutes, or in an oven at 375°F (190°C) for 10-15 minutes, until heated through and crisp. Microwaving is not recommended as it will make them soggy.
- Make-Ahead (Uncooked): You can season the wings with baking powder and salt, arrange them on the rack, and let them air dry in the refrigerator for up to overnight. This actually improves crispiness!
- Make-Ahead (Sauce): The Buffalo sauce can be made a day or two in advance and stored in an airtight container in the refrigerator. Gently reheat on the stovetop or in the microwave before tossing with hot wings.
- Freezing: Cooked wings can be frozen, but their texture will significantly degrade upon thawing and reheating. It’s best to cook fresh.

(Conclusion)
These Crispy Baked Buffalo Chicken Wings are a game-changer. By using simple, smart techniques, you can achieve that coveted crispy skin and classic flavor without the mess and added fat of deep frying. They’re a guaranteed hit for any occasion, offering that perfect balance of tangy, spicy, and utterly addictive deliciousness. So, grab your wings, get baking, and prepare for a truly fantastic culinary experience! Enjoy!